


Overview of Rear Brake Pads Replacement
Regular brake maintenance is crucial for ensuring your safety on the road. Understanding the process of rear brake pads replacement is essential. Rear brake pads play a pivotal role in stopping your vehicle effectively, and ignoring their upkeep can compromise safety.
The replacement process for rear brake pads involves several steps to ensure optimal performance. Rear brake pads have an expected lifespan, typically ranging from 30,000 to 70,000 miles, depending on driving conditions and habits. Factors like frequent braking, harsh driving conditions, and hauling heavy loads can reduce this lifespan. Monitoring the wear and tear helps in timely interventions.
A lire en complément : Essential Tips for Winterizing Your Diesel Engine in UK Vehicles: A Complete Guide
During the replacement, ensure that the vehicle is securely lifted and the wheels removed to access the brake calipers. Removing the old pads involves retracting the caliper piston and slipping out the worn pads. The new pads are inserted, ensuring they are properly aligned and secured. Concluding the process involves checking that everything is tightly fitted, avoiding any loose components.
In conclusion, keeping track of regular brake maintenance can save you from unexpected failures. Being aware of the replacement intervals and understanding the process can ensure your vehicle’s braking effectiveness, enhancing both safety and performance.
A lire en complément : Unlocking UK Compliance: The Definitive Guide to Installing Aftermarket Body Kits
Required Tools and Materials
Understanding the need for the right tools and materials is critical for an effective rear brake pad replacement. Equipping yourself with essential items can streamline the process, enhancing both safety and efficiency.
Essential Tools
Before commencing the replacement, ensure you have a few critical tools. A set of wrenches is crucial to loosen the bolts securing the caliper. Use a brake piston tool to retract the caliper piston smoothly, which is essential for fitting the new pads without damaging them. A car jack and stands are also indispensable for safely lifting and securing the vehicle during replacement.
Recommended Brake Pads
Choosing the appropriate brake pads is vital. Ceramic brake pads are a popular choice for daily driving due to their durability and low noise. Meanwhile, semi-metallic pads offer higher performance and heat management, though they may produce more dust and noise. Evaluate your driving habits to make an informed choice.
Optional Tools for Enhanced Performance
Optional tools such as a brake pad spreader can facilitate even placement of pads, ensuring optimal alignment. While not mandatory, these tools can ease the process and enhance performance. Additionally, investing in a thorough brake quiet kit can minimise noise issues post-installation, keeping your system in peak condition.
Safety Precautions
Prioritising safety during rear brake pad replacement ensures a smooth and secure process. Begin by equipping yourself with essential safety gear such as gloves and eye protection. These protect against grime and debris, ensuring both your hands and eyes remain unscathed.
Before starting, confirm your vehicle is on a level surface and securely lifted using a reliable jack and stands. Even a small imbalance can result in accidents during replacement, so it’s vital to ensure stability.
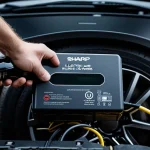
Another key precaution is disconnecting the battery. This power cut-off prevents accidental electrical discharge while working. Double-check your toolkit: make sure all necessary tools are within reach, reducing disruptions and avoiding rushed, unsafe movements.
Finally, inspect the surrounding workspace for additional hazards. Items scattered around can cause trips or falls, hindering the replacement process. By maintaining an organised environment, you eliminate potential risks.
Remember, safety goes beyond tools. It’s an attitude of care and best practices that helps avoid injuries and complications. By embracing these precautions, you support a successful and danger-free brake pad replacement experience.
Step-by-Step Brake Pad Replacement Instructions
Performing a brake pad replacement on your Ducati Streetfighter V4 can be a satisfying DIY project when done safely and correctly. Follow this step-by-step guide for a seamless process.
Preparing the Ducati Streetfighter V4
Start by ensuring your bike is on a stable, level surface. Using a motorcycle lift, securely elevate the Streetfighter V4 for accessible handling. Before diving in, disconnect the battery to prevent electrical mishaps. Gather all necessary tools from your kit, making certain they are within easy reach.
Removing the Old Brake Pads
Begin by using a wrench to loosen and remove the caliper bolts, setting them aside carefully. Once detached, retract the caliper piston with a brake piston tool, freeing the worn pads. Gently slide out the old brake pads, taking care not to damage nearby components. A clean cloth sweep helps in maintaining a dirt-free environment.
Installing the New Brake Pads
To install the new brake pads, position them within the caliper, ensuring correct alignment. Slide the pads into place, ensuring they are stable and fit perfectly. Replace and tighten the caliper bolts snugly to secure the assembly. Finally, double-check that every component is properly fastened, ensuring a successful brake pad replacement.
Expert Tips for Optimal Performance
Ensuring top performance of your brake system extends beyond installation. Following expert advice can significantly optimise your rear brake pad replacement process, improving the longevity and effectiveness of the brakes.
Bed-In Procedures
After installing new brake pads, implementing a proper bed-in procedure is essential. This process creates an even layer of material on the rotor, enhancing performance and safety. To begin, conduct several moderate stops from around 30 mph without coming to a complete halt, then let the brakes cool down. Follow this with a few harder stops to ensure optimal bedding.
Maintaining Brake System Health
Consistent upkeep of your brake system is pivotal. Regularly check brake fluid levels and replace when necessary, as fresh fluid can greatly improve braking responsiveness. Examine all components for wear and tear, addressing issues promptly to prevent minor problems from escalating.
Avoiding Common Mistakes
During brake pad replacement, common mistakes, such as improper alignment and incorrect torque application on bolts, can undermine the entire process. Always ensure that new pads are properly seated and caliper bolts are torqued to manufacturer specifications. This attention to detail minimises potential errors and increases the efficiency of the brake system.
Troubleshooting Common Issues
When replacing rear brake pads, some issues might arise, warranting troubleshooting. Addressing these proactively ensures optimal performance and safety.
Squeaking or Grinding Noises
Experiencing squeaking or grinding noises during braking can be unsettling. These usually indicate issues such as pad misalignment. Check for glaze on the pads or rotors—sanding them lightly may resolve noise issues. In cases where the grinding persists, inspect the brake pads for wear. New pads might need replacement if overly worn.
Uneven Brake Wear
Uneven brake wear can compromise the system. Monitoring for irregular pad thickness or rotor surface conditions is crucial. Potential causes include a stuck caliper. Routine checks and cleaning can mitigate this. If wear is significant, replacing both pads and the rotors may be necessary for balanced braking.
Brake Fluid Considerations
Brake fluid is integral to brake system health. Regular checks ensure that the fluid is at optimal levels, avoiding brake failure. If the fluid is dirty or discoloured, it requires replacement. This maintenance step prevents air entry in the brake lines, ensuring efficient brake operation and responsiveness.
Visual Aids: Enhanced Understanding
Utilising visual aids can significantly improve your understanding and execution of rear brake pad replacements. Images and videos provide step-by-step guidance, clarifying intricate details you may encounter during the replacement process.
Interactive video tutorials are particularly beneficial for visual learners, as they demonstrate each step in action. These resources often include expert commentary, offering contextual insights that written instructions may not encompass. Look for videos that focus on the specific model you’re working on for the most relevant tips.
Images serve as quick reference points, capturing essential tools and showing exact positioning during each stage of the replacement. They can highlight proper alignment and tool usage, helping to avoid common mistakes.
Additional visual aids showcase various brake pad types and their unique benefits, aiding in informed decisions when selecting replacement pads. They help you visually identify when your brake pads are worn to the point of needing replacement.
Incorporating these visual tools ensures a comprehensive grasp of the process, boosting confidence and precision. Even if you’re a seasoned DIY enthusiast, leveraging these resources enhances accuracy and efficiency, contributing to a successful brake pad replacement experience.
Conclusion and Further Resources
Exploring further resources can significantly aid Ducati enthusiasts in mastering brake maintenance. Engaging with online communities and forums provides valuable insights and shared experiences from fellow riders. These platforms are teeming with maintenance tips and troubleshooting advice for the Ducati Streetfighter V4, helping to refine your DIY approach.
When searching for quality brake parts, consider recommendations from established Ducati forums. Experienced users often guide newcomers towards reputable sellers and durable brake pads, whether opting for ceramic or semi-metallic types. The feedback from these communities emphasizes reliability and longevity, aligning with the rider’s safety priorities.
Additionally, regular participation in these forums encourages the exchange of innovative techniques and solutions discovered by peers. This collective knowledge can illuminate less commonly known practices that enhance the braking system’s performance.
For those looking to enhance their understanding, consider exploring additional resources like Ducati-specific maintenance manuals or video tutorials. These materials can provide insights into model-specific nuances, further supporting the successful completion of brake maintenance tasks. By leveraging these resources and connecting with the Ducati community, you can ensure your motorcycle remains in peak condition and optimise its overall performance on the road.